My Blog has moved! Please click the image to redirect to my new homepage
http://lh5.ggpht.com/_GDSbJt-LMgg/Seze18s1CeI/AAAAAAAAJAQ/roRhR93GN7g/bgr_header%20copy.jpg

Some projects

, Wednesday, February 25, 2009 2 comments

There are some projects going on to expand my portfolios. I needed to practice and luckily got a volunteer model to help me realize the concept.

Dengan harapan dan doa untuk Ijazah Sarjana dari Universiti of Manchester 2009. Amin.

http://lh6.ggpht.com/_GDSbJt-LMgg/SaTNUU3IQAI/AAAAAAAAIAA/RocyYPVwn-w/DSC_1871.jpg

Di hadapan Whitworth Hall, salah satu bangunan yg sinonim dengan University of Manchester pada pukul 6.30pm..


Ada sambungan sikit..behind the scene

Mula-mula carik exposure yang sesuai pakai ISO200..dapat dalam 10 seconds..kadang-kadang ada bas lalu , tu yang buat line yang kacau bilau kat bawah. Ideanya bagaimana nak buat portrait pakai flash & long exposure. Agak mencabar..
http://lh6.ggpht.com/_GDSbJt-LMgg/Sac70xV75iI/AAAAAAAAIEo/E4WUwILQBYg/DSC_1863.jpg


Try ambil gambar macam ni..model kecik sangat pulak. Ghosting dan blur pada subjek. Memang susah nak dapat gambar yang sharp kalau long exposure ni. Idea saya ialah untuk bagi flash freeze the subjek. Tapi tak menjadi. Finally, dah tahu apa masalahnya. Memang flash boleh kasi freeze subjek, tapi kena makesure kalau ambik gambar tanpa flash, subjek& tempat dia berdiri tu gelap habis. Background terang, foreground gelap jadi barulah boleh freeze model tu. Takpe, lain kali boleh try. Gambar ini terang foreground dgn background.

http://lh3.ggpht.com/_GDSbJt-LMgg/Sac7zQM6StI/AAAAAAAAIEg/Zq5Z6sMVR3Y/DSC_1860.jpg

Line-line yang kacau bilau tu ok jugak kalau kena masanya. Tapi pose ni macam cover album penyanyi ballad je...sedih dan mengelamun pasal cinta. Subjek sharp sebab kaku gila lebih dari 5 saat. Sporting la model!
http://lh6.ggpht.com/_GDSbJt-LMgg/Sac72gqoBzI/AAAAAAAAIEw/bMyMsf3l_J8/DSC_1868.jpg

Increase ISO, nak kasi pendek sikit masa exposure sebab photographer pun tak boleh stay lama lebih dari 5 sec. Nota tambahan..saya guna off flash ketuk sikit dari sebelah kanan. Pakai power sikit je nak terang muka.
http://lh4.ggpht.com/_GDSbJt-LMgg/Sac73r0S-nI/AAAAAAAAIE4/-5m_k-TtXuU/DSC_1883-2.jpg

Zoom sikit dan kasi buang colour. Saya agak suka yang ini sebab background boleh baca la University of Manchester tu.

http://lh4.ggpht.com/_GDSbJt-LMgg/Sac743ltkBI/AAAAAAAAIFA/2y9Kmon8tsE/DSC_1898.jpg

Haa..kalau belaja buat cara belaja, jangan nak berpeluk-peluk depan U, tapi dah kahwin takpe..:) (Thaqif seperti biasa..tidur dlm stroller)

Read More......

London trip part 4

, , Monday, February 23, 2009 0 comments

Berapa banyak edition dah ini trip...anyway saya sambung saja selagi
ada orang nak tengok :). Di samping tu selit sikit-sikit la macamana gambar diambil.

http://lh4.ggpht.com/_GDSbJt-LMgg/SaL00sZDBAI/AAAAAAAAH-E/8GenaSdIdoo/DSC_0607.jpg
London Tower Bridge

Jambatan kat tengah tu boleh turun naik nak bagi kapal lalu. Kitorang tak check pulak dia punya schedule. Gambar ni kalau camera takde high ISO capabilities kena pakai tripod la gamaknya. Okey, bila rasa macam nak ambik gambar banyak kat satu tempat, kita pelbagaikan angle dan perspective gambar kita. Jangan takut nak mencuba, kita bukan nak menjual gambar kat orang tapi untuk simpanan sendiri dan bereksperimentasi. Jom..


Lepas gambar melintang, gambar menegak pulak..
http://lh3.ggpht.com/_GDSbJt-LMgg/SaL0zQVvj7I/AAAAAAAAH98/J2UFozZaU3E/DSC_0598.jpg
Ha..kan lain sikit feel dia.
http://lh3.ggpht.com/_GDSbJt-LMgg/SaL01fu7MCI/AAAAAAAAH-M/vkGBt5OA4ow/DSC_0609bw2.jpg
Tak cukup, kita bagi black n white pulak. Google je macam mana nak bagi gambar black n white ni. Knowledge is free di zaman IT ni but experience is priceless by the way.
http://lh6.ggpht.com/_GDSbJt-LMgg/SaL02AVzOSI/AAAAAAAAH-U/yiUhe65ErIg/DSC_0613bw.jpg
Dua orang berlainan ambil gambar yang sama tapi mempunyai sudut pandangan yang berbeza.

Thaqif masa ni dia dah tidur, jadi malas nak kejut dia. Lepas ni kitorang ke underground pulak. Keretapi bawah tanah yg tersohor di London
http://lh6.ggpht.com/_GDSbJt-LMgg/SaL04v6xZNI/AAAAAAAAH-k/JElGwj-o4gw/DSC_0635.jpg
Nak turun ke tempat menunggu keretapi ini melalui berpuluh-puluh anak tangga. Nasib tak baik takda lif di stesen ni. Kami berdua terpaksa mengangkat Thaqif yg tengah tidur dalam 'stroller' untuk sampai ke bawah.
http://lh4.ggpht.com/_GDSbJt-LMgg/SaL05r-vSgI/AAAAAAAAH-s/jph8x_6aB1k/DSC_0644bw.jpg
Kitorang pun naik keretapi ke rumah member lama saya..Syam. Pekena nasik dan bum-bum untuk hari esoknya.

Read More......

Jom Makan di Manchester

, , Saturday, February 21, 2009 2 comments

It's gonna be fun!

http://lh5.ggpht.com/_GDSbJt-LMgg/SZ83_rq_RjI/AAAAAAAAH7U/WFoz0K-Qs8M/poster2.jpg

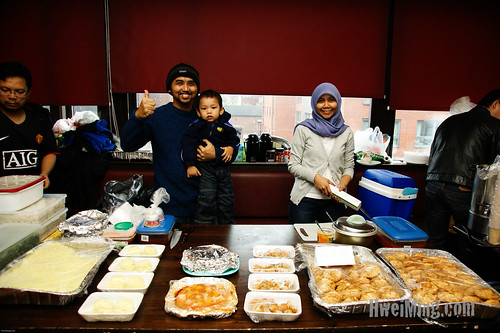
M-Games-Hwei-Ming-45 by Hwei Ming.

Credit to HweiMing.com for the pic. Best jugak 16mm kau. He lives here.

Sebelah tu is Jue yang banyak gila membantu. Thanks!

Read More......

Learning to See Differently

, , Thursday, February 19, 2009 0 comments

I constantly train my eyes to compose different views of some common pics.
Two people looking at the same subject in one location may have different perspectives.
One may see hidden objects and one may see plain postcard view.
Sometimes it just plain luck to capture the great image.
Practice makes perfect macam latih tubi la.


View from the bus tour top.

Read More......

Quick & Dirty Way to Control TTL flash Exposure

0 comments

I know that using flash in manual mode is the way to go to control the
desired power. However, it requires a lot of hours and practice to really
master and bend the light the way you like it. Eventually practice makes
perfect.

Sometimes,...a lot of time maybe, I use TTL to let the camera computes
the desired power for me. Set the camera to manual and bounce the flash.
However, sometimes I found out the flash throw extra power than what I
needed. From my research (by internet laa.) TTL computes quite accurately
when the subject is dead in the center of frame.

Most of time,my subject is not in the centre, probably more to either side.
This is where I open my camera manual and study a bit about the FV lock function
in my camera. I found it very useful for a quick & dirty way to control the
flash power. Here is my experiment:

I set up my subject like this to simulate the distance subject to background. (The toy car is my subject i.e #7)


I wanted to compose the car a little bit to the left and normally I set the camera
to manual mode and set the flash to TTL. Since the ceiling was not that high I
set the TTL to 0 compensation. Here I used shutter speed of 250 to kill all
the ambient light. The flash was bounced straight upward.I find some blown
highlights from the subject and the background was not as dark like I wanted
to. The camera did a very good job to expose the whole scene but not to the
photographer's preference.


Next, to correct this, I centered the subject and fired the FV button. It threw
a flash and kept it in memories. (erm..maybe for those don't know how to
set the FV button need to open camera manual . I took the picture here


Needed to chimp the result, and I think I needed to increase a little more power to the subject. I set Flash Compensation to +0.3


With the flash power still in the memory, I shot the subject with my desired
composition. I think, this time there was a lot of improvement from the first pic


When we have locked the flash value, we can place the subject anywhere we like
(in the frame) as long we keep the distance to the subject as same as the initial setup.
Exposure will remain the same throughout the shots.

---------------------------------------------------------------
After all those discoveries, I practiced often to familiar myself with the method. Knowledge needs to be applied to let it resides in our head. Here are some..

I use ISO800 and longer shutter speed to control the background exposure.
I use the FV lock to control my flash. Without the FV, the flash throw its
power to compensate the far backgound and blown my subject. I bounce
the flash up to the right. Even though its one directional but I like the way
the picture looks like. Something like there were no flash used.


For this picture, I bounce the flash to the left of camera and use the FV
lock. I need to be quick or else they'll loose their mood to the cold. There's
shadow cast from the son face to his father body that I forgot to notice.


Yeah, U can use it to your built in flash. Especially when you want somebody to take your picture.


Note : Need to check ur camera whether it has the Flash Value Lock Function.

Read More......

London trip part 3

, , Sunday, February 15, 2009 4 comments

Now...sambung lagi..


Dari Madam Tussaud..terus ke sini lak


Kita just lepak kat entrance aje. Nak masuk muzium kena bayar lagi.
Di luar kita dihiburkan dgn the Sprats. Patung yang boleh nyanyi ikut miming
penyanyi asal. Memang unique robotics nih


Then ke Trafalgar Square. Landscape view..sayang tak banyak burung merpati macam
selalu tengok kat TV tu.. Boleh click the picture to view large version


My wife sgt terharu berada kat situ. Selalu berangan aje tapi tak sangka dah
sampai di sini. Photographer kena bertugas untuk merakam perasaan gembira pelanggannya. :)

Info : Gambar ni pakai built in flash. banyak shot traveling ni saya pakai built in flash nak kasi subject terang sikit. Tapi kena make sure subject tak terlalu jauh sangat sampai 8-10 kaki. flash dia tak power macam speedlight.
Manual metering kasi expose kat belakang tu gelap sikit. ISO pakai agak tinggi sikit @640 sebab dah nak gelap dan pakai maximum zoom.

Dah siap setting..photographer pun nak sebijik gak.


Big Ben dari jauh..Saya ambik ni kat atas tangga national library. Waktu-waktu nak petang langit dah keluar colour biru gelap dia. Saya nak make sure masa di Big Ben nanti waktu senja. Senja hopefully akan keluar warna-warna yang dramatik.


Di sini kadang-kadang ada orang buat exhibition/free show. Mamat ni nak promo dia punya show nanti. Dia panggil volunteers dan susun diorang macam tu. Mula-mula dia tahan badan diorang dengan kotak buah tu. Lepas dia cabut kotak dia, dia campak pulak minah ni kat formation diorang. Tak jatuh wa cakap lu!


Kalau nak tau pukul berapa boleh tanya patung tu. Setiap saat dia tau.


Tube station yang dekat dgn Big Ben ni ialah Westminster Station.


Tak sah kalau tak snap bas merah klasik ni. Driver dia nak sambung bertugas lepas pekena kopi. Tapi nombor plat bas ni macam dari KL lak.


Time yang cantik..


Memang halus diorang bikin bangunan ni.


Dah ambik gambar-gambar wajib big ben, kita belasah angle pelik-pelik pulak.


Tiket Bus Tour ni boleh naik free boatride sepanjang sungai Thames. Nampak la Eye of London. Tak naik sebab kasi fair la sebab kat Malaysia pun tak pernah naik. :)


Lepas setengah jam naik boat, kitorang exit dekat dengan tower bridge. (london bridge is falling down). Dekat dgn tower bridge ini ada satu tourist attraction-tower of London. Kitorang just ambik gambar jelah..Masa tak cukup nak pergi semua tempat.

Sekali lagi..built in flash digunakan. Manual mode, slow sync.


Next entry..Tower Bridge. Thanks for viewing!

Read More......